|
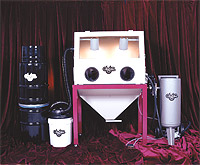
Instructions for Sit-Down Blasting Cabinet
 Cabinet Set-Up Cabinet Set-Up
To remove your cabinet from the pallet, use a 3/4" socket to
unscrew the four bolts under the legs. Then lift the cabinet off
the pallet by the frame. Next, install the adjustable feet. Place
the cabinet in its permanent location.
Adjust the feet to the proper height. Test to make sure the
cabinet does not rock. Use a 3/4" open-end wrench to tighten the
nuts against the bottom of the legs.
Install the magnetic base lamps in the cabinet on any wall. Feed
cord through rear holes on the left and right side of the
cabinet. Leave enough slack inside the cabinet to allow the lamps
to be placed anywhere in the cabinet without having the cords
stretched across the work area.
Plug the lamps into the power supply mounted on the side of the
cabinet. Install the rubber grommets on the cords, and slip the
grommets into the holes on the side of the cabinet.
Clean the inside of the window. Stick one of the clear mylar
window shields to the inside of the cabinet window.
Vacuum Hook-Up
Attach the vacuum hose adapter (ferrule) that is supplied with
the vacuum over the 2 1/4" hole on the side of the cabinet. Use
the four small hex-head self-tapping screws that come with the
cabinet. A small amount of silicone sealer applied to the base of
the adapter will prevent dust leakage. Plug the vacuum into the
power supply mounted on the side of the cabinet.
Blaster Hose
The front holes on each side of the cabinet are for the blast
hose. Most right-handed people prefer the hose to enter from the
right side, and vice versa for "lefties." The hole that is not
used should remain plugged. In order to feed the hose through the
hole, the nozzle-end assembly will have to be removed. When
replacing it, be certain that it is properly secured in the hose
before using the blaster.
Feed enough hose into the cabinet to make a loop. This will give
you much more flexibility and freedom of movement than if you
tried to constantly adjust the hose length by pushing and pulling
it through the hole. However, the best solution to a stiff sand
hose is to use a Glastar Flexible Hose Assembly. This will make your blasting much easier.
TOP of page
Care And Maintenance
The Sit-Down Cabinet requires very little maintenance. The parts
most commonly replaced are the plastic window shield, and the
door gaskets.
Replacing The Mylar Window Shield
Over time, the mylar shield inside the window will acquire a
frosted surface as the result of abrasive ricocheting against it.
The rate at which this occurs will depend on your individual
blasting style, but it will need to be replaced on a regular
basis. It is a good idea to keep a couple of spares on hand.
Replacing The Door Gaskets
The gaskets are standard 3/4" wide x 1/2" thick light-duty foam
weather-stripping, which is available at any hardware store. Pull
off the section you want to replace, clean the surface, apply the
replacement strip, and trim the ends flush.
Replacing The Window
Do not attempt to replace the window with ordinary plate glass!!
Replace with original factory parts.
TOP of page
- Important -
Safety Considerations For Sandblasting
Be certain that you follow carefully all the manufacturers'
instructions for setting up your compressor, blaster, and vacuum.
Double and triple-check everything before blasting, paying
particular attention to connections, pressure gauges and valve
settings.
BE SURE THAT THE CABINET IS CLOSED AND LATCHED BEFORE TURNING ON
THE BLASTER!!!
The ball valves usually seen on pressure-pot blasters can reach
the early stages of wear fairly quickly, and a small amount of
leakage from the "business end" must be considered "normal." In
other words, EVEN WHEN THE BLASTER IS "OFF," IT CAN STILL SPIT
OUT ABRASIVE PARTICLES!! Treat the blaster as you would a gun: it
is always loaded; so don't point it at anything you don't want
blasted. It should be treated with respect and handled soberly.
When shutting down for the day, make sure that all power to the
lights and vacuum is off, all air valves are shut off, and THE
CABINET DOOR IS CLOSED AND LATCHED.
Respiration Protection
WEAR A DUST RESPIRATOR, especially when the cabinet is open or
the abrasive is being recycled back into the pressure pot. A good
respirator is a worthwhile investment - those little paper and
rubber band masks are pretty useless for sandblasting. Because of
the danger of silicosis, never use sand as an abrasive. Either
silicon carbide or aluminum oxide is safer, but there will still
be silica dust generated by the abrasion of the glass itself, so
always use your respirator.
Eye Protection
ALWAYS WEAR EYE PROTECTION, ESPECIALLY WHEN THE DOOR IS OPEN!!!
Hearing Protection
HEARING PROTECTORS are a good idea, too. Some exhaust systems are
loud, and they usually stand right next to your ear. Earplugs are
ok, but the earmuff types are more comfortable and easier to use.
Hearing protectors have the added benefit of helping you focus on
your work by filtering out the rest of the world.
Hand Protection
The cabinet comes with nylon sleeves. You will need to find some
rubber, or tightly woven gloves that fit and give you the
combination of sensitive feel and secure grip that you like.
Dishwashing gloves work quite well. Experiment with different
gloves. They really are an underrated link in the blasting system
as far as comfort and endurance are concerned.
These are standard precautions that should be observed no matter
what type of cabinet you are using.
BE CERTAIN THAT YOU, YOUR EMPLOYEES, AND ALL OTHERS WHO HAVE
ACCESS TO YOUR SANDBLAST FACILITY FULLY UNDERSTAND THE SAFE
OPERATION OF YOUR EQUIPMENT!
If you have any questions, comments or suggestions regarding your
sandblast cabinet, please don't hesitate to contact Glastar.
BACK to Sit-Down main page
TOP of page
|


