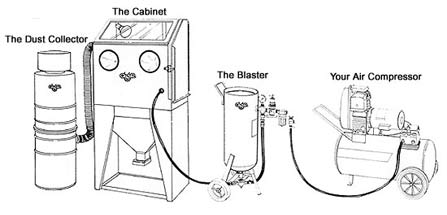
A Sandblast System typically consists of 4 major units:

After each unit is assembled individually, they need to be attached to each other to complete your system. The diagram represents the major components of a sandblasting system, not necessarily the exact pieces of equipment that you have purchased.

Start with the Dust Collector. Attach the Dust Collector to the Cabinet with a flange mounted on the side of the Cabinet and a flexible "dryer-type" hose.
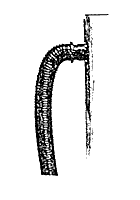
If you have the smaller 2 1/2" hose, insert the end of the hose into the
flange, as shown to the right. Connect to the smaller Dust Collector in the same way.

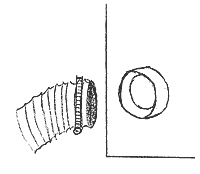
If you have the larger 4" hose that comes with the larger Dust Collectors, attach it to the flange with a hose clamp, as shown to the left. Connect to the larger Dust Collector in the same way.
The clamps are found with the Dust Collector. The Dust Collector can be placed on either side of the Cabinet, but it is generally on the left, when viewed from the front. Attach the hose to the lower flange on the Dust Collector.
The next item to connect is the Blaster to the Cabinet. Run the abrasive hose from the bottom of the Blaster through the one-inch hole in the front or side of the Cabinet. You will have to remove the end assembly from the abrasive hose, pass the hose through the hole, then reinstall the hose end assembly.

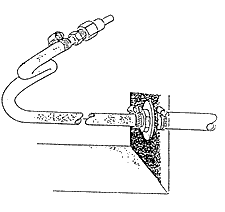
If you purchased the Flexible Hose Assembly, attachment is slightly different. One end of the Flexible Hose Assembly is the Nozzle End Assembly. This is what you use to blast inside the Cabinet.
On the other end is a 1" nut and hose adapter. Pass the threaded part of this piece through the wall of the Cabinet from the inside so that the threads are visible on the outside of the Cabinet.
Then place the large washer over the threads against the wall of the cabinet. Turn the 1" nut down on top of the washer and tighten with a wrench.
Next, take the abrasive hose attached to the bottom of the Blaster and remove the Nozzle Assembly. Keep this assembly. It is the same as what is on your Flexible Hose Assembly.
Push the hose end over the hose adapter that protrudes from the side of the Cabinet. Secure the hose to the adapter with the hose clamp that was used to clamp the nozzle end to hose.
The final step is to connect the Blaster to Your Air Compressor. Connect it with a 1/2" pipe-threaded hose or use a quick disconnect that can be purchased from the same place you purchased your Compressor. The inside diameter of your air hose should be no smaller than a 3/8" inside diameter.
You are now ready to add your abrasive and start blasting!
TOP of page
|


